Thursday, February 23, 2006
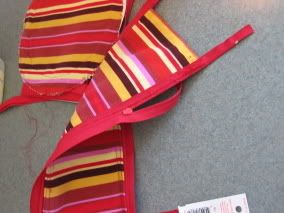
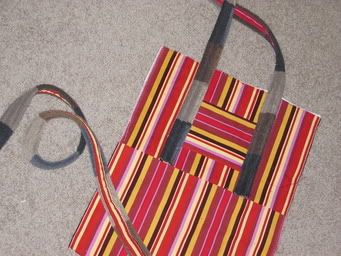
I know I know. How many bags does one girl need, right? This project is a little bit more involved...this is a hobo bag I bought in Italy a few years ago. I love it. It's easy and very versatile. But now the fabric is looking tired and stained on the bottom and I decided to take it apart so I can figure out how to sew a replica out of fresh fabric.
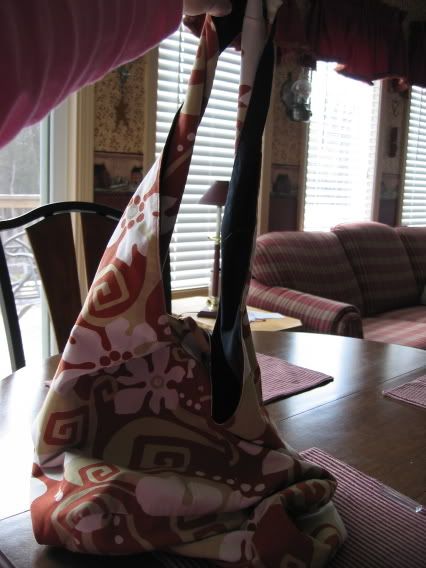
I've already made a couple of tentative copies, but I really want to get the proportions right and I'm also curious about how they did the bottom seam.
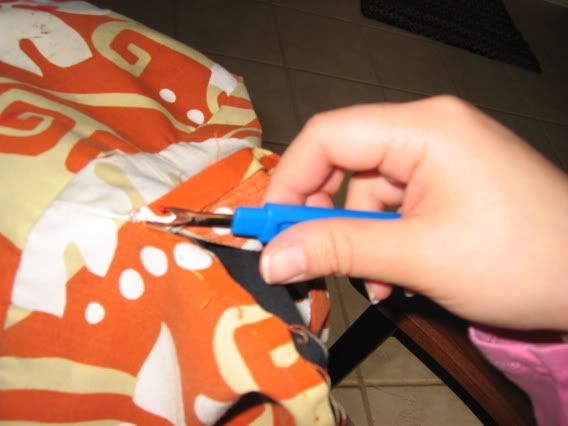
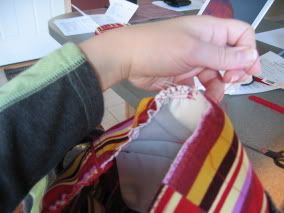
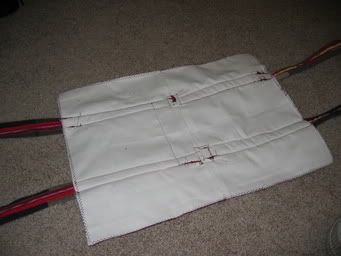
There's nothing that makes a seamstress out of you like figuring out how to do something by taking it apart. It's not just getting the pattern pieces flat. A seam reveals the secrets of how it was constructed in reverse when you slowly take it apart thread by thread. Most home sewers I know seem to shy away from the term "seamstress", and I agree it is an old fashioned term. But I like it.
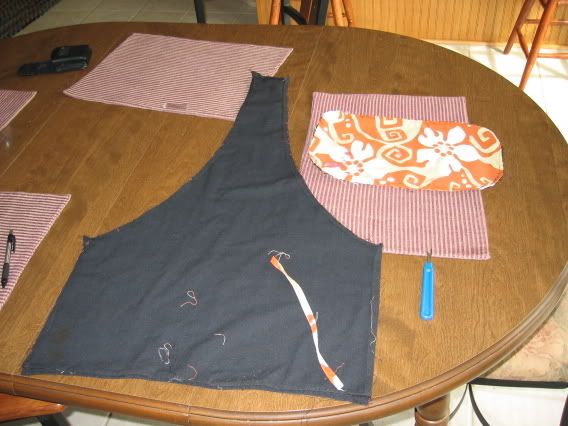
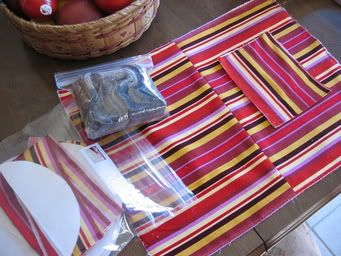
These are the relevant carcass pieces to make the pattern out of. I am going to recycle some old drapes to make those bags.
I've already made a couple of tentative copies, but I really want to get the proportions right and I'm also curious about how they did the bottom seam.
There's nothing that makes a seamstress out of you like figuring out how to do something by taking it apart. It's not just getting the pattern pieces flat. A seam reveals the secrets of how it was constructed in reverse when you slowly take it apart thread by thread. Most home sewers I know seem to shy away from the term "seamstress", and I agree it is an old fashioned term. But I like it.
These are the relevant carcass pieces to make the pattern out of. I am going to recycle some old drapes to make those bags.
Organization will set you free

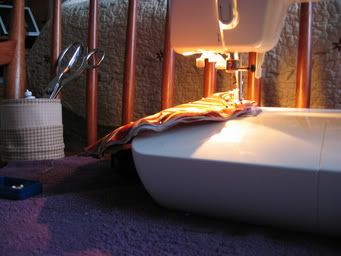
This is my sewing station. I made a combination pressing surface/organizer by folding up one edge of a towel and sewing vertically into a row of pockets to keep my necessaries in. It's awfully handy. The advantage of keeping the machine on an arrangement like this is that I can press without getting out of my place. I do my pressing much more conscienciously now that I can keep my iron hot by my side to apply as necessary instead of having to schlepp the whole thing over to the ironing board.
Another organization tip for you -- I keep a metal cup inside one of the little pockets in my organizer right near the needle on the machine. Then I take care to snip my threads close to the fabric and dropping the ends into the cup. This extra fraction of a second I spend taking care of this detail on every seam saves me time in the long run as I no longer have finished work full of hanging thread ends to be snipped off and my work area is not liberally peppered with linty bits!
The big tote
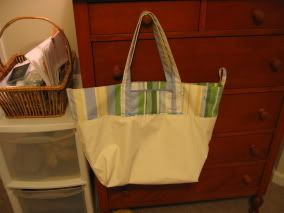
Y'all have seen the cute little totes I made using Super Eggplant's Supertutorial. But after making one cute little tote after another, I felt up to a challenge. Not only did I make this tote huge, I also dressed it up with some detail variations. Note how I made the lining much longer than the outer layer so that the extra fabric forms the top of the bag. I also folded the box bottom up and topstitched onto the right sides instead of hiding them between the two layers of the bag as usual. By making the lining longer than the outside fabric of the bag, I lowered the "hem" where they met, and therefore made inserting the handle inside this "hem" impractical. They were topstitched on, and I took the opportunity to insert a pocket between each set of handles.
Maybe some of what h just written does not make absolute sense if you have not made the totes yet. I am just realizing how limited my vocabulary is when it comes to describing my sewing work.
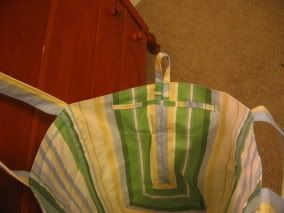
Here's a view of the inside of the tote. Note the loop I added so that this tote can be hung on a hook when it is not being used. I also added a little...doohickey...just a little strap sewn in vertically at intervals forming little loops for keeping my pens and things in. The ability to add fun little details like this on a whim is part of what makes sewing such an attractive craft to me , as supposed to, say knitting, which I also love in some ways. Now if only I can get better at describing what I'm doing.
Over all, I am pleased with this tote except for one thing -- I ran out of white thread, and used this weird peacock blue I had left over from another project instead to finish this bad boy off. It really wass too dark for the fabric, though, and every mistake in topstitching now shows. Ouch! I would be a much better seamstress if I were not so impatient! And careless! And disorganized! (Because really, there is no excuse for running out of white thread. It's disorganization). All I can say is those are all qualities I strive to improve on in my life in general as well as in my sewing, so perhaps in improving as a seamstress I can also improve my organization-fu in general.
Wednesday, February 15, 2006
Done! Finally.
Son of a whore, attaching that last pocket end temporariliy gave me turrett's syndrome. But it got done. Behold...
Tuesday, February 14, 2006
My travails with the duffel continues...
Oy Oy Oy. this is turning out to be quite the project. I got the pocket ends made. No trouble with that.
Though as you can see in the picture below, bulk yet again rears its ugly head. This thinkness is going to be the cause of much consternation later one.
I know that applying zippers is supposed to be one of the simpler sewing skills. But I find it strangely intimidating. I think this is because I really messed up a few zipped closures in my earlier projects, and that residual fear carried over to this day. So I took my time with this, pressed whereever necessary and topstitched whereever necessary, and all the zippers in this project came out very nicely indeed.
Here's my big nemesis: Gathering. You know, when you take two lines of basting and draw the bobbin thread to get the fabric to gather evenly without puckering or ugly bunching. For the longest time this technique eluded me. But I think I have it down now. First of all, make sure you have both sets of bobbin threads (from both rows of basting and from both beginning and end) in your hands before you start, or you run the risk of doing what I did the first time, and pulling the bobbin thread completely out of my work! Naturally it the gathering did not work at all. The next time I was more careful. The trick, apart from holding on to both ends of the thread, is to pull the bobbin thread only a little bit, enough to pucker up the inch or two of fabric nearest to where you are pulling the thread. Then use your fingers to smooth this puckering along the length of the basting. Then pucker the nearest inch or two again. Pucker and ease, pucker and ease. Never go too far too fast, or your thread will break and you will be left with the unpleasant job of removing your basting and starting anew.
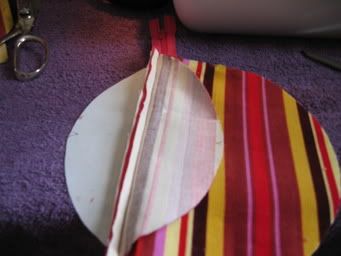
Now that I have done the gathering step (the instructions said "gather slightly." What does that mean exactly? I gathered until my thread broke and I couldnt' be bothered to do it over again.), another unpleasant task lay ahead of me -- matching up the circular pocket end with the hole in the bag end. The thickness was formidable, and I had terrible trouble with uneven stitching and too much fullness in the pocket end fabric that refused to get eased into the bag end. The two layers of fabric also refused to stay together, shifting over each other as I sewed.
As you can see, I was so off that some of my stitching failed to join the two pieces of fabric altogether, leaving me with a sad gaping hole. I had to take all the stitching out to redo.
This time I was smarter. I pinned all the way around parallel to the seam as opposed to perpendicular to it. I figured this will give me more control with sliding layers of fabrics. What also helped was placing the layer of fabric that seem to have more fullness (the pocket end) underneath -- next to the feed dogs. The rational is that the feed dogs tend to drag the fabric layer next to it into the needle at a faster rate than the layer of fabric on top, thus eating up the extra fullness and doing my easing for me.
That's the theory anyhow. This time the stitching turned out fine. There was still some evidence of puckering, but I figure I did OK. I really should have stopped my sewing session at this point. I was tired, I was losing my concentration, but I pressed on because the project seemed so close from getting done. I grabbed my bias binding and began to apply it to the raw edge inside the bag with a zigzag stitch. What a disaster -- it was such an easy operation, but I botched it through being rushed and now it looks terrible and uneven. "Well", I thought grumpily, "it's going to be on the inside of the bag. Who's going to look there?" Just goes to show...always stop what you're doing and pack up when that "dum...dum...dum...get it done...done...done..." tune starts playing in your head.
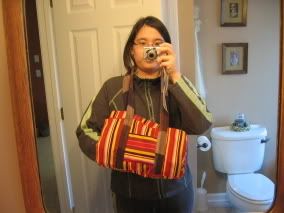
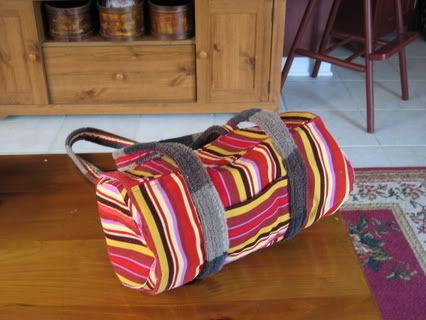
This is me with my almost-done bag. I need to apply the other bag end along with some velcro, and that will be it. But I'll be saving it for another session.
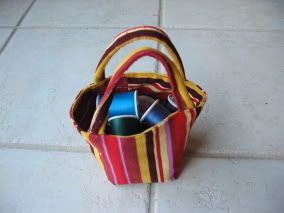
This is another reason why I'm such a slow sewer. I get distracted with little side projects like this cute little square-bottomed bucket tote which I now use to hold my threads.
Though as you can see in the picture below, bulk yet again rears its ugly head. This thinkness is going to be the cause of much consternation later one.
I know that applying zippers is supposed to be one of the simpler sewing skills. But I find it strangely intimidating. I think this is because I really messed up a few zipped closures in my earlier projects, and that residual fear carried over to this day. So I took my time with this, pressed whereever necessary and topstitched whereever necessary, and all the zippers in this project came out very nicely indeed.
Here's my big nemesis: Gathering. You know, when you take two lines of basting and draw the bobbin thread to get the fabric to gather evenly without puckering or ugly bunching. For the longest time this technique eluded me. But I think I have it down now. First of all, make sure you have both sets of bobbin threads (from both rows of basting and from both beginning and end) in your hands before you start, or you run the risk of doing what I did the first time, and pulling the bobbin thread completely out of my work! Naturally it the gathering did not work at all. The next time I was more careful. The trick, apart from holding on to both ends of the thread, is to pull the bobbin thread only a little bit, enough to pucker up the inch or two of fabric nearest to where you are pulling the thread. Then use your fingers to smooth this puckering along the length of the basting. Then pucker the nearest inch or two again. Pucker and ease, pucker and ease. Never go too far too fast, or your thread will break and you will be left with the unpleasant job of removing your basting and starting anew.
Now that I have done the gathering step (the instructions said "gather slightly." What does that mean exactly? I gathered until my thread broke and I couldnt' be bothered to do it over again.), another unpleasant task lay ahead of me -- matching up the circular pocket end with the hole in the bag end. The thickness was formidable, and I had terrible trouble with uneven stitching and too much fullness in the pocket end fabric that refused to get eased into the bag end. The two layers of fabric also refused to stay together, shifting over each other as I sewed.
As you can see, I was so off that some of my stitching failed to join the two pieces of fabric altogether, leaving me with a sad gaping hole. I had to take all the stitching out to redo.
This time I was smarter. I pinned all the way around parallel to the seam as opposed to perpendicular to it. I figured this will give me more control with sliding layers of fabrics. What also helped was placing the layer of fabric that seem to have more fullness (the pocket end) underneath -- next to the feed dogs. The rational is that the feed dogs tend to drag the fabric layer next to it into the needle at a faster rate than the layer of fabric on top, thus eating up the extra fullness and doing my easing for me.
That's the theory anyhow. This time the stitching turned out fine. There was still some evidence of puckering, but I figure I did OK. I really should have stopped my sewing session at this point. I was tired, I was losing my concentration, but I pressed on because the project seemed so close from getting done. I grabbed my bias binding and began to apply it to the raw edge inside the bag with a zigzag stitch. What a disaster -- it was such an easy operation, but I botched it through being rushed and now it looks terrible and uneven. "Well", I thought grumpily, "it's going to be on the inside of the bag. Who's going to look there?" Just goes to show...always stop what you're doing and pack up when that "dum...dum...dum...get it done...done...done..." tune starts playing in your head.
This is me with my almost-done bag. I need to apply the other bag end along with some velcro, and that will be it. But I'll be saving it for another session.
This is another reason why I'm such a slow sewer. I get distracted with little side projects like this cute little square-bottomed bucket tote which I now use to hold my threads.
Thursday, February 09, 2006
Bulk is the Enemy
My most current project is the intriguing mini-duffel by Savvy Seams. There are several techniques in this bag that are new to me, so I'm taking things one step at a time. I'm using some precious fabric, a momento of sorts since I bought it in Japan when I visited my boyfriend there several years ago. We didn't take a single picture the entire time I was there, so now I only have a few pieces of fabric and a few other assorted knick-knacks to remind me of the trip.
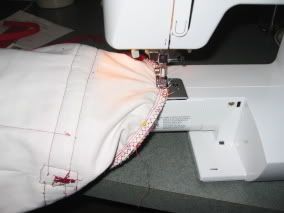
Here we are near the beginning of the project. The pieces have been cut and the "body" pieces seamed together. You can see I am using a very cute striped corduroy. I am following the pattern pretty precisely, except for adding a few pockets here and there for functionality.
Note the strap, for which I sacrificed a Calvin Klein towel that is just the right color combo to set off the colorful cord. I added additional interest by sewing a thin strip of cord with the raw edges tucked under on the wrong side of the strap, which also covered the raw edges of the strap nicely. I get a first inkling of troubles to come when I notice how my sewing machine struggled to overcome the full thickness of 2 layers of terry and corderoy. It chugged along...but only barely.

She cannae tek it any more, capt'n!
I thought I had it tough making the strap. Sewing it to the bag, and worse, applying the lashing points, were murder. At the thickest point the needle had to pierce, I guess there was two layers of terry and a whopping six layers of cord (two in the strap where it is folded under, two in the lashing point where it is folded under, two in the seam allowance) plus another layer of lining. I guess I didn't think about how I was going to deal with all that bulk while I was merrily scheming away about my awesome terry strap. Somehow, with copious use of the hand wheel, I got through it all.
Oy vey! The nasty lumps of thread tells the sorry tale of where my sewing machine got bogged down. Luckily, the rightside looks fine, and I will bag in an interior lining to hide the lumps after the bag is finished. I've never done that before either, but there's a first time for everything, right?
Here we are near the beginning of the project. The pieces have been cut and the "body" pieces seamed together. You can see I am using a very cute striped corduroy. I am following the pattern pretty precisely, except for adding a few pockets here and there for functionality.
Note the strap, for which I sacrificed a Calvin Klein towel that is just the right color combo to set off the colorful cord. I added additional interest by sewing a thin strip of cord with the raw edges tucked under on the wrong side of the strap, which also covered the raw edges of the strap nicely. I get a first inkling of troubles to come when I notice how my sewing machine struggled to overcome the full thickness of 2 layers of terry and corderoy. It chugged along...but only barely.
She cannae tek it any more, capt'n!
I thought I had it tough making the strap. Sewing it to the bag, and worse, applying the lashing points, were murder. At the thickest point the needle had to pierce, I guess there was two layers of terry and a whopping six layers of cord (two in the strap where it is folded under, two in the lashing point where it is folded under, two in the seam allowance) plus another layer of lining. I guess I didn't think about how I was going to deal with all that bulk while I was merrily scheming away about my awesome terry strap. Somehow, with copious use of the hand wheel, I got through it all.
Oy vey! The nasty lumps of thread tells the sorry tale of where my sewing machine got bogged down. Luckily, the rightside looks fine, and I will bag in an interior lining to hide the lumps after the bag is finished. I've never done that before either, but there's a first time for everything, right?
Tuesday, February 07, 2006
Bags o' bags
For some reason, I love making bags. I think this is because I enjoy working with smaller pieces of fabric, so that they are all under my control, and also because I have a short attention span, making many garment projects mindnumbingly boring. Bags are always fun and practical, even the tiny totes in this picture, which I now use to keep my notions organized.
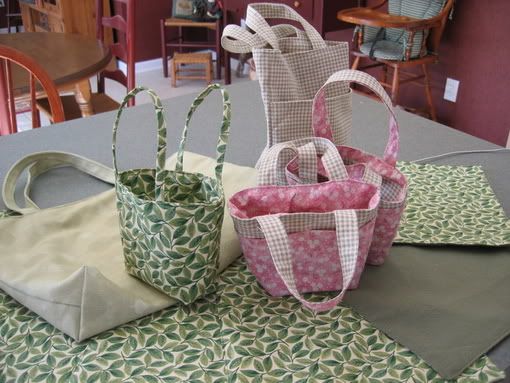
The method for making these totes can be found at the kickass tutorial written by Super Eggplant.
My next bag project, which is moving forward concurrently with a very ambitions boned bodice project, is going to be a duffel handbag, instructions from savvy seams. Stay tuned...
The method for making these totes can be found at the kickass tutorial written by Super Eggplant.
My next bag project, which is moving forward concurrently with a very ambitions boned bodice project, is going to be a duffel handbag, instructions from savvy seams. Stay tuned...
Welcome, my crafty friends...
Well, I guess you are crafty, imaginary friends as of now, since this blog is only just a twinkle in my eye. However, in case I actually get me some readers later, this is what you need to know about me.
I just love to do things. This means I sew, knit, homebrew, crochet, cook, bake and play the guitar without being particularly good at any of those things. In addition, I have plans to learn how to make basket and candles, to macrame, to do basic woodworking...the list goes on. One day I want to write a book on crafts called "The beginner's guide to everything", and it will be just that -- the bare minimum you need to know to complete a little project in all sorts of crafts.
However, I always have fun and keep busy, and put 100% into my latest projects, and that's the most important thing. This blog is a way of organizing my projects and planning new ones out loud, as well as sharing what I learnt with the world.
My political blogging can be seen at Battlepanda, my nom de guerre in the blogging world.
![]()